How to use the WDS Bridging function to extend my wireless network of Archer MR200 (new logo)
My house covers a large area. The wireless network coverage of the router I’m using (the root router) is limited. I want to use an extended router to extend the wireless network of the primary router. Follow the steps to configure the router.
1. Please refer to How to log into the web-based management interface of Archer MR200? (new logo)
2. Configure the LAN IP address of the router in the same subnet as the root router. For example, if the IP address of the root router is 192.168.0.1, the IP address of the extended router should be from 192.168.0.2 to 192.168.0.254.). You can change it on Advanced > Network > LAN Settings page.
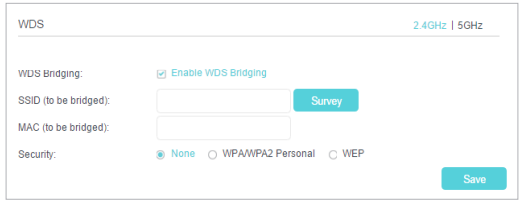
3. Go to Advanced > Wireless > Advanced Settings page and locate the WDS section.
4. Select the wireless network 2.4GHz or 5GHz appropriate to your needs and select the checkbox to enable the WDS Bridging function.
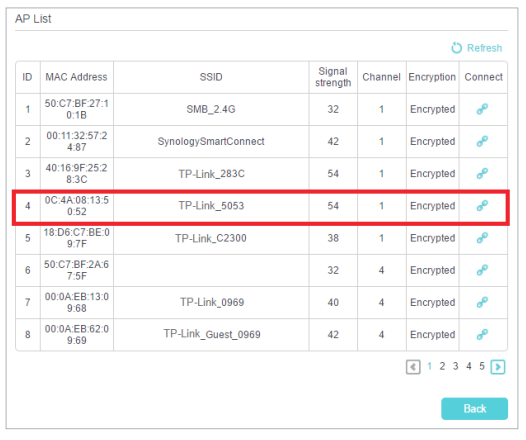
5. Click Survey to scan all the AP devices and choose the root AP to be bridged.
6. Click the connect icon and then the SSID and MAC will be auto-populated. Configure the Security settings as the AP you choose to be bridged.
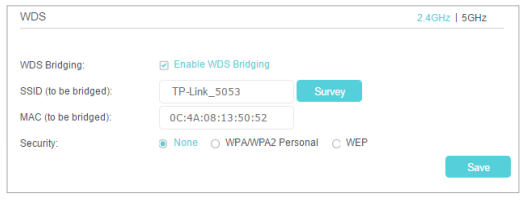
7. Click Save to make the settings effective.
8. Go to Advanced > Network > LAN Settings page to disable DHCP.
Now, the root’s wireless network is extended and you can use the router’s SSID and password to enjoy the network.
Note: The extended router (4G LTE router) can have different SSID and password from the root router, you can change your router’s SSID and password on Basic > Wireless page.
Get to know more details of each function and configuration please go to Download Center to download the manual of your product.
Is this faq useful?
Your feedback helps improve this site.
TP-Link Community
Still need help? Search for answers, ask questions, and get help from TP-Link experts and other users around the world.