How to configure the bridge with AP mode on the TL-WA7510N
This Article Applies to:
Definition:
In networking, Bridge with AP mode allows two or more wireless access points (APs) to communicate with each other for the purpose of joining multiple LANs. Besides, this mode can also provide local wireless coverage.
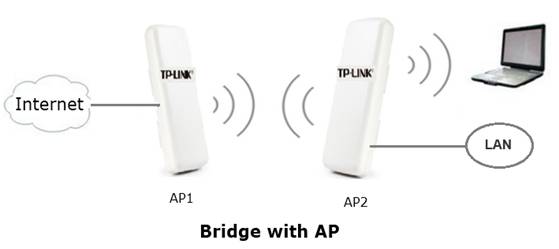
This article is about how to setup Bridge with AP mode on the TL-WA7510N.
Configuring the Access Point
Step 1
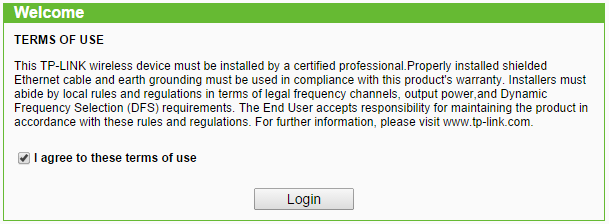
Connect your computer to AP1 with wired connection. Refer to FAQ to configure static IP (here we use 192.168.0.100 as example) for the computer. Loginto the Web-based Interface by entering the default IP address 192.168.0.254 into the address bar of your web browser. Default username and password are both admin. Select "I agree to these terms of use" and click login.
Step 2
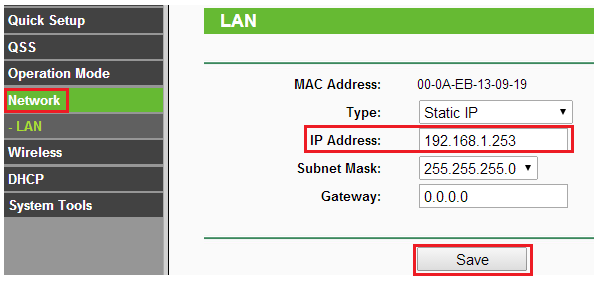
Click on Network on the left side, refer to FAQ_173 to change the LAN IP Address of AP1 (here we take 192.168.1.253 as example) as below to avoid IP conflict with AP2 if necessary and click save.
After changing the IP address of AP1, you need re-log into it by using the new IP address. If the IP address has been changed to a different subnet you need to change the IP address on your computer accordingly.
Please note that the IP addresses of AP1 and AP2 cannot be the same in your network.
Step 3
Configure AP1 to Bridge with AP mode.
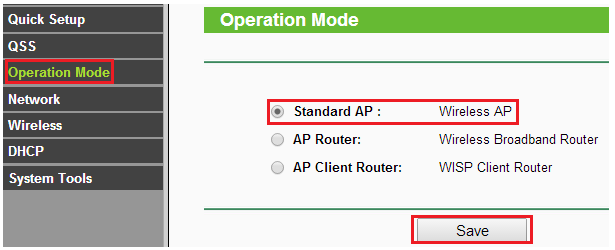
1. Click on Operation Mode on the left menu, select Standard AP and click save.
2. Go to Wireless -> Wireless settings on the left menu, select Bridge with AP, change the Region、channel to suitable ones and enable DFS as default.
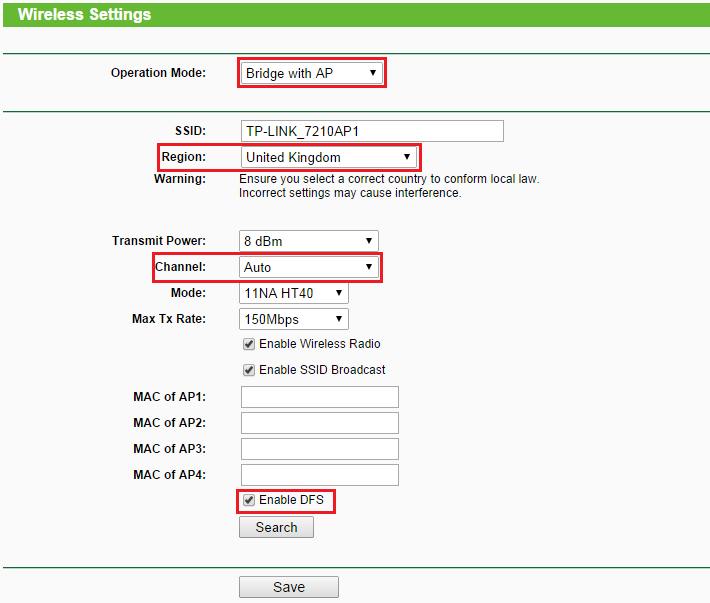
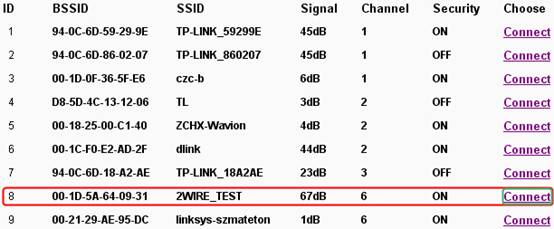
3. Press Search button at the bottom, an AP list will be displayed. Locate the BSSID (MAC address) of AP2, remember the Channel-> Click Connect.
4. Then the MAC address of AP2 will be displayed in the MAC of AP1 box.
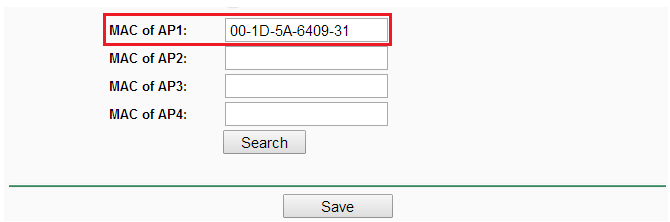
5. Click on Save button at the bottom to save the settings.
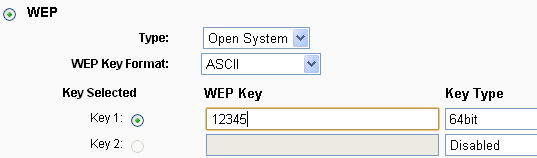
6. Go to Wireless-Security Settings to secure the wireless as WEP. Note that it only supports WEP when AP1 is configured as bridge mode.
7. Go to System Tools-Reboot to reboot the device or the settings will not take effect.

Step 4
Configure AP2 as Bridge with AP mode and follow the same above steps.
Note:
1. The SSID of AP1 and AP2 can be different, but the Region、security settings and channel of them should be the same.
2. Because TL-WA7510N and some radars share the same band of 5GHZ,the DFS function should be enable as default.
3. TL-WA7510N in Bridge with AP mode only supports WEP in wireless-security, and WEP does not support 802.11N, so the wireless connection speed is 54M instead of 150M.
Get to know more details of each function and configuration please go to Download Center to download the manual of your product.
Is this faq useful?
Your feedback helps improve this site.